Introduction
Arbitrary line scanning requires you to design a scan path for the scan mirrors to follow. The scan path is designed as a stimulus group, the same way photostimulation patterns are designed. Stimulus groups are a special kind of ROI group that define a parametric path instead of a 3D volume. A stimulus group is comprised of multiple ROIs that define a continuous sequential laser path.
Designing Scan Paths
Stimulus groups allow complete freedom in designing the path for the laser to take. Best practices should be followed to ensure desired results. A stimulus pattern is comprised of a sequence of stimulus functions, each of which can be parameterized with position, size, rotation, laser power, number of repeats, parametric function, and custom parameters for the parametric function. The stimulus function can be chosen from a set of built in or custom stimulus functions.
A typical stimulus pattern should consist of pause functions interleaved with stimulus functions at desired positions, IE:
- Pause function
- Sinesquare function
- Pause function
- Logspiral function
- Pause function
- Point function
The pauses between stimulations are important because the galvo's require time to travel between ROIs. Without the pauses (or if the pauses are too short), the pockels cell will be open while the galvo is still traveling to the desired ROI, causing light exposure to the wrong part of the sample. If too large of a change in position is commanded without adequate transit time, or if the stimulus pattern is too demanding of performance from the galvo's, the galvo controller may reset, causing a momentary loss of galvo position control. It is therefore important to carefully design the stimulus pattern to avoid this and test the pattern to make sure the results are desirable.
Waypoints are a special stimulus function that can be very useful for designing a scan path. If there is a point you are interested in sampling data at, you could place a point stimulus function there. This would cause the scan mirrors to move to that point and stop there for the specified duration. It is much faster, however, to pass through the point without stopping, just exposing the beam over the point. This can be achieved using a waypoint function. Waypoints constrain the path to pass through the desired position with the beam exposed for the desired duration as the scan mirrors pass through the point.
Using the Stimulus Editor
To edit the scan path, launch the stimulus editor from the MAIN CONTROLS or CONFIGURATION interface by clicking Edit ROIs. In the stimulus editor, an image can be copied in to serve as a context for designing the stimulus pattern. You can show a context image from the legend by turning on the live image, taking a snap shot, or loading an image from a tiff file.
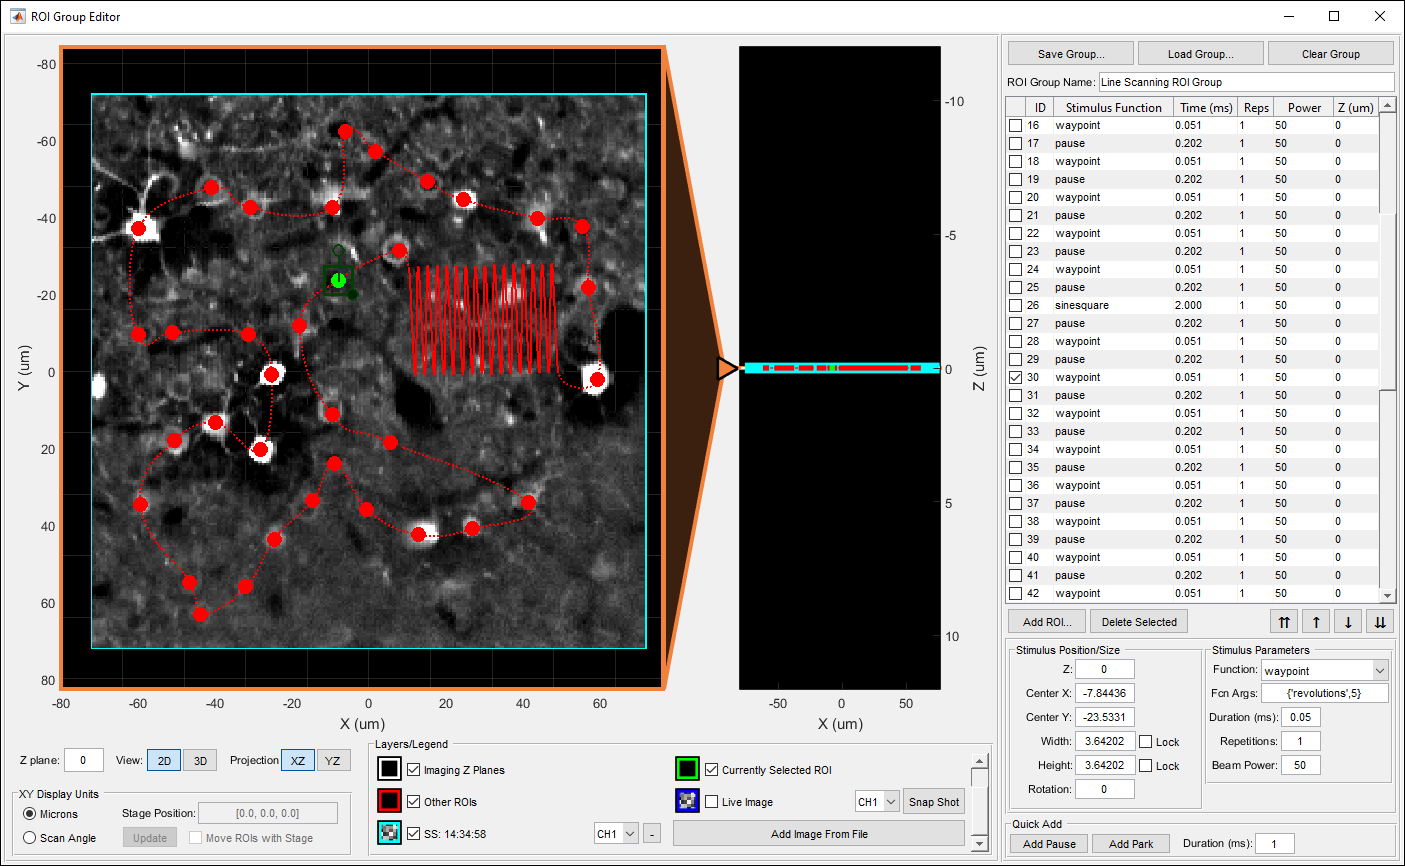
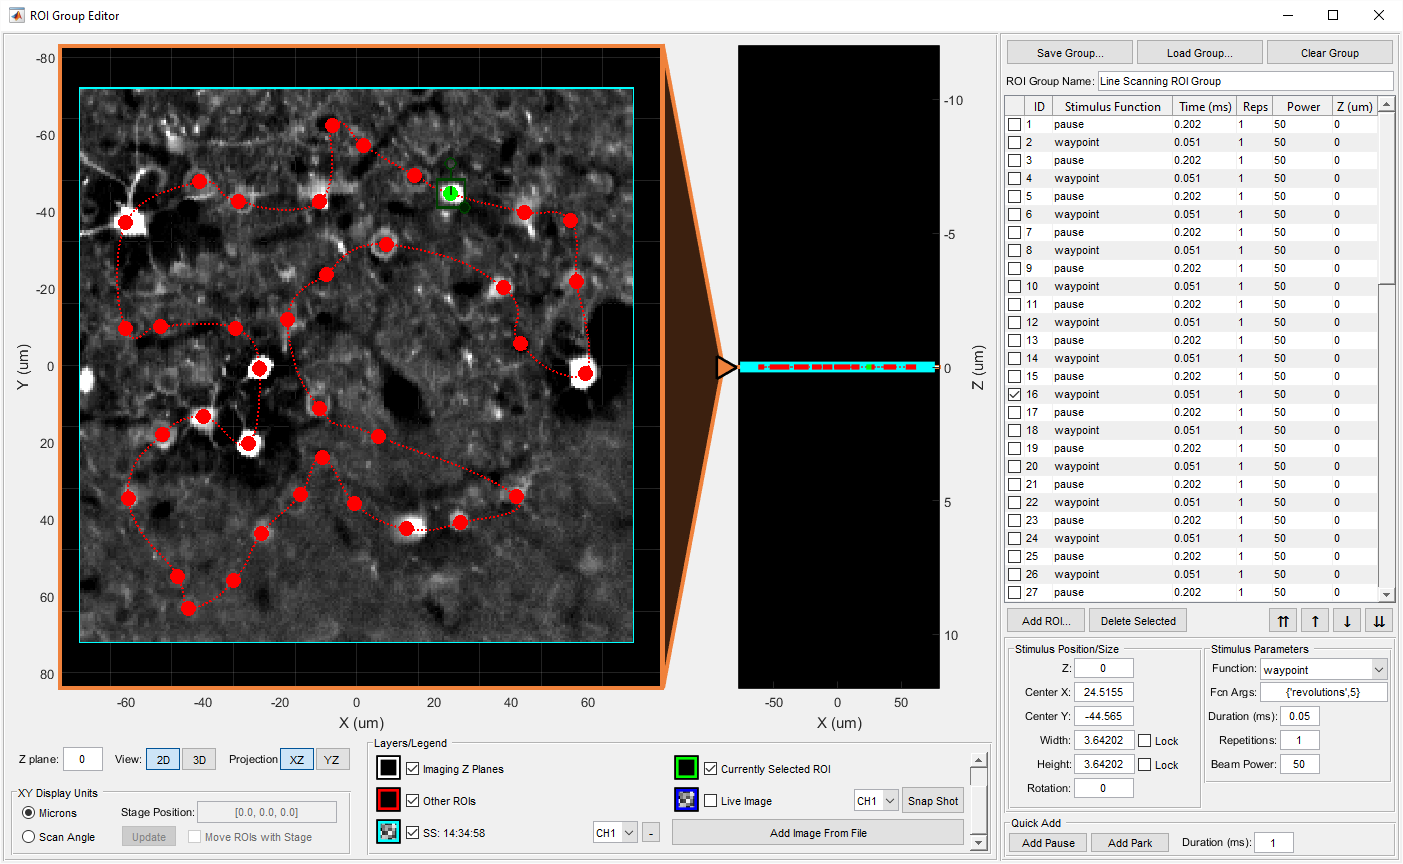
To add a stimulus function, click the Add ROI... button under the table display. You select parameters for the stimulus function from the panel in the bottom right then draw the desired function in the main view. The Quick Add panel in the bottom right can also be used to easily add pause and park functions. The sequence of stimulus functions is displayed in the table view. The controls below can be used to reorder or remove functions. Select a stimulus function in the table or in the main view to view its parameters in the bottom right. A complete reference for the stimulus editor interface can be found in the window reference guide. The screen shot below shows an example of designing a scan path using way points and a sine square to sample a larger area of interest.