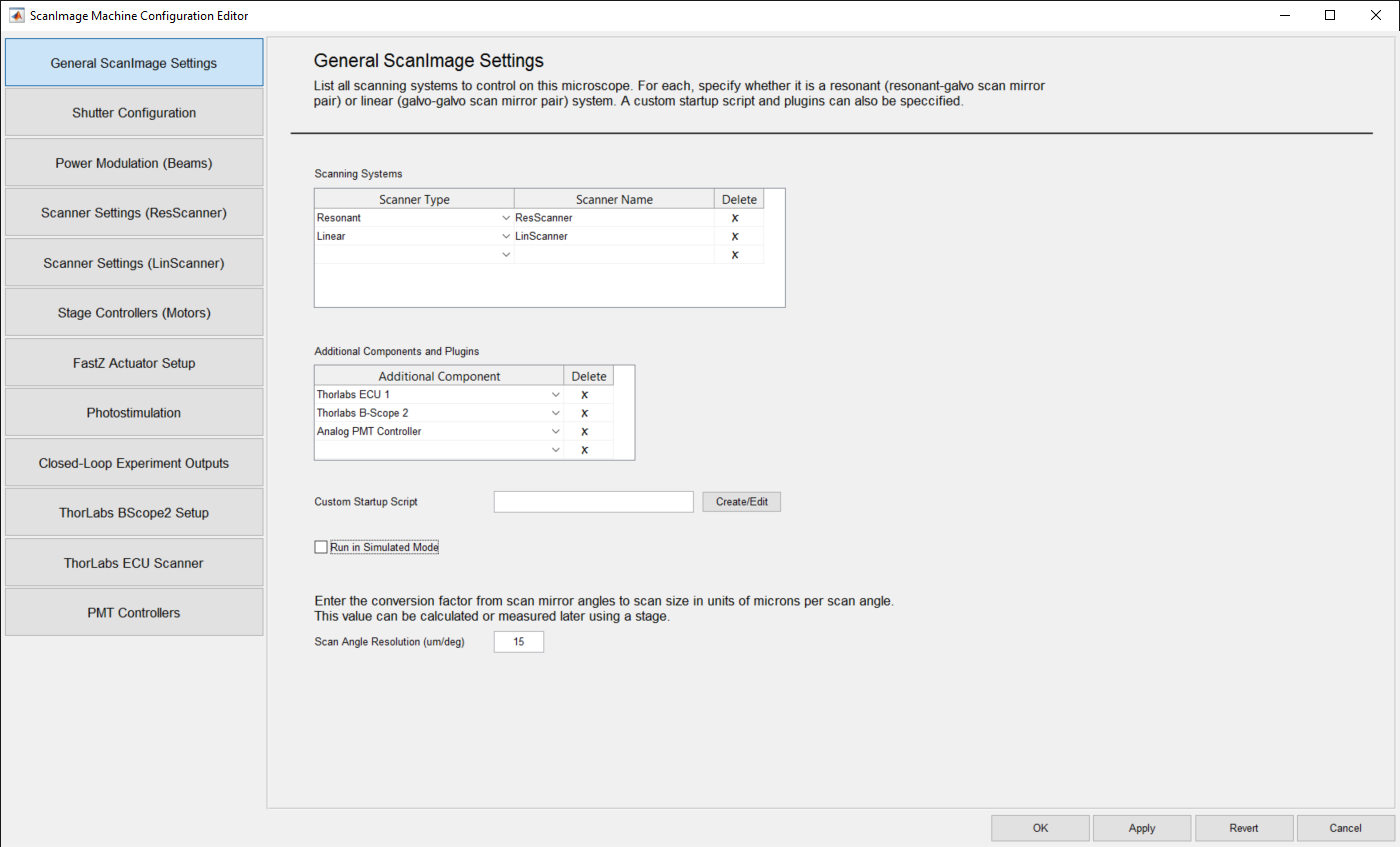
General ScanImage Settings Panel
Scanning Systems Settings
| Scanner Type | Drop down selection of the types of scanners available in ScanImage. Currently there are two scanner types available: Resonant and Linear. |
| Scanner Name | Enter a name for the scanner, indicating a scan path in the microscope. |
| Delete | To delete a row, press the "X" on the row you want deleted. |
- One default row is provided for a new ScanImage Machine Data File (MDF).
- The default entry is a "Resonant" scanner with the name "ResScanner".
- This row can be deleted.
- The Scanner Name can be edited.
Additional Components and Plugins Settings
Additional Component (Thorlabs ECU1) | Select the Thorlabs ECU 1 item from the drop down list if that scanner is part of your system. This will add the ThorLabs ECU Scanner settings section to your configuration. A Thorlabs ECU Scanner section will be displayed and available for settings entry. |
Additional Component (Thorlabs BScope 2) | Select the Thorlabs BScope2 item from the drop down list if that component is part of your system. This will add the ThorLabs BScope2 settings section to your configuration. A Thorlabs BScope2 Setup section will be displayed and available for settings entry. |
| Additional Component (Analog PMT Controller) | Select the Analog PMT Controller item from the drop down list if that component is part of your system. This will add the PMT Controllers settings section to your configuration. A PMT Controllers section will be displayed and available for settings entry. |
| Additional Component (Custom...) | In the case where you have additional microscope components and/or plugins that you would like to interface with ScanImage not listed here, you can add a custom component. Select the Custom... item from the drop down list if you want to add additional components and/or plugins. |
| Delete | To delete a row, press the "X" on the row you want deleted. |
Bottom Panel Display Settings
| Custom Startup Script | User defined script that is executed after ScanImage is started and initialized, just before the GUI is displayed. |
| Create/Edit | Press the Create/Edit button to create or edit a custom startup script. |
| Run in Simulated Mode | Check the Run in Simulated Mode checkbox if you want to activate simulated mode. This should be checked for operations without NI hardware attached. This should be unchecked for normal operations. The default is unchecked. |
| Scan Angle Resolution (um/deg) | Enter the resolution of the objective in microns/degree of the scan angle. A default value of 15 is provided. |
Custom... Component and Plugin

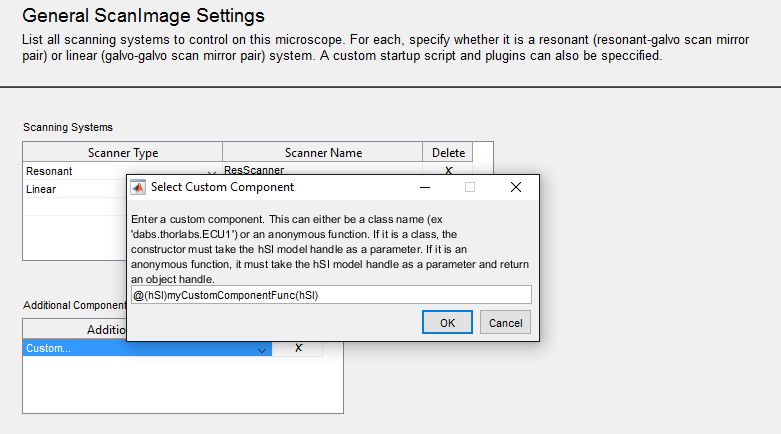
Select Custom Component Popup Window
In the case where Custom... was select in the Additional Components and Plugins table, a Select Custom Component Popup window is displayed.
Enter your custom component as described and press OK.
Pressing Cancel closes the Popup window and clears the Custom... entry from the Additional Components and Plugins table.