What is µManager
µManager is an open source microscopy software based on java and integrated with ImageJ to provide a suite of microscope control . This includes extensive support of various microscopy hardware such as stages and cameras. For a complete list of cameras supported by µManager, visit the µManager website.
Installing µManager
Download the latest version of µManager 1.4 nightly built.
Installation of µManager should be done according to the instructions available on their website which have been provided here:
"Run the installer (MMSetup_xxxx.exe) and follow the prompts. The package includes a copy of ImageJ and Java. You might need to install drivers for your cameras and possibly other equipment (see our Device Support page).
Micro-Manager is intended for Windows XP and later. Some versions may work on Windows 2000 (by installing some additional components), but this is untested and unsupported.
There are no particular hardware requirements. However, for practical use we recommend a 1.7-GHz or better processor and at least 512 MB of RAM. Depending on your camera (image size) and imaging speed, you may want to have a lot more RAM."
Configuring a µManager Device for ScanImage
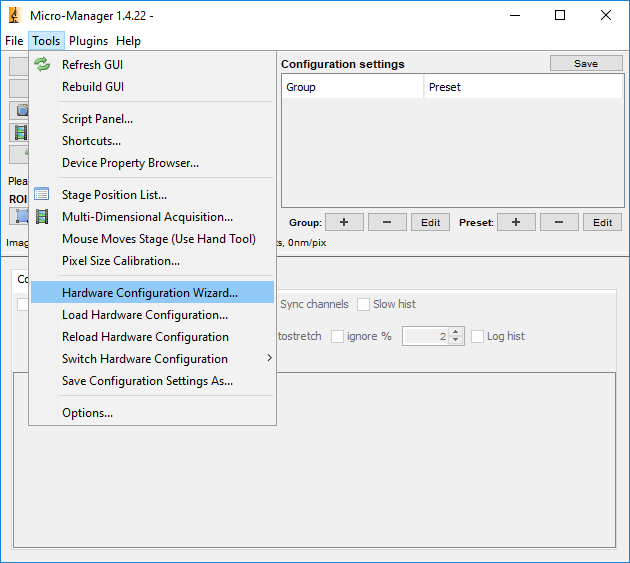
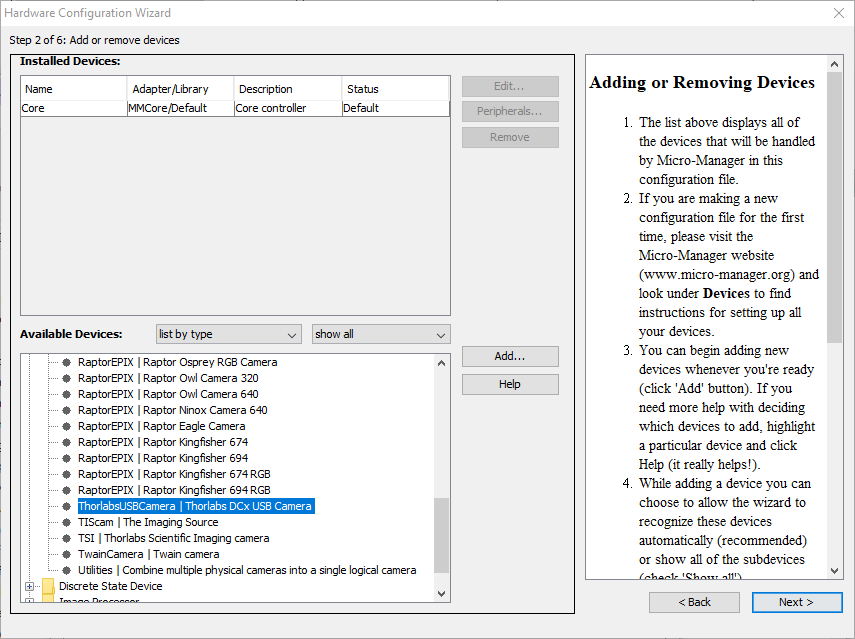
In order to use a device via µManager in ScanImage create a .cfg file for that device in µManager. Open the Hardware Configuration Wizard under Tools. This configuration consists of 6 steps.
Step 1: Select Create New Configuration and then select Next.
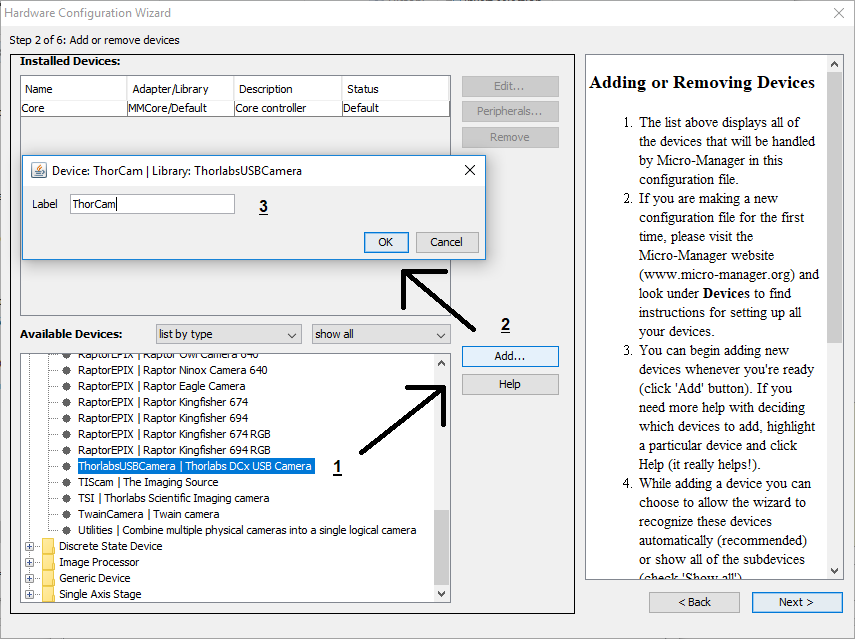
Step 2: Select your device by searching either by Vendor or by Device Type. In this example I search by type and select the Thorlabs USB Camera. Once you have selected your device click add, this will bring up a window to assign a device label, click okay when you are done. You Should now see the device, with the given label number, under Installed Devices at the top of this window. Select Next.
Steps 3-5: These are unnecessary for ScanImage and are only used to setup configuration parameters if you intend to use the µManager software as your primary Microscopy software. You can simply select Next for these steps with out changing anything.
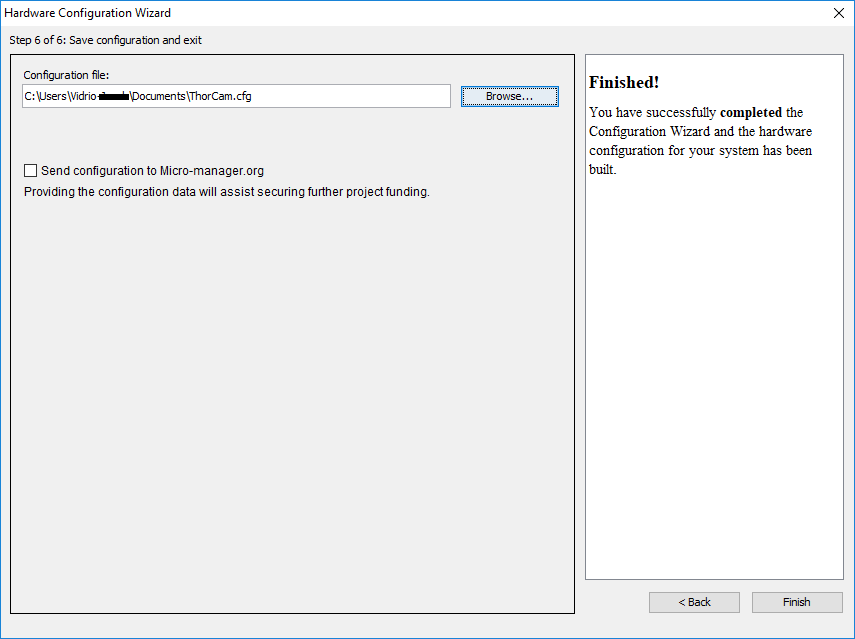
Step 6: Give the config a name and select the location to save it to. Make sure you make note of this directory or choose one that is commonly used as you will need to navigate to this file to configure your device in ScanImage. Click Finish once you have selected a name and location.
Now to use the device in ScanImage you only need to provide the cfg you just created and the µManager install directory to the MicroManager class we provide to access the device.